Steel coated epoxy floors give you the best of both worlds—they’re durable and appealing to the eye. Not to forget that they’re economical too, given that they can last a lifetime. Compared to traditional flooring materials like concrete and wood, to some, epoxy floors might seem too good to be true!
Having worked for more than thirty years as epoxy flooring contractors, we can guarantee that the epoxy floor coating process itself is proof of the popular flooring method’s qualities. Epoxy flooring is a chemical process that requires the expertise of experienced professionals. If done correctly, you get low-maintenance floors that are almost fully impact resistant.
To help you understand what to expect when you get your steel epoxy flooring done, here is a step-by-step explanation of the epoxy floor coating process by our experts.
1. Grinding The Floor
The first step is to prepare the area where the epoxy floor will be installed. After all furniture is removed and the area to be floored is marked, our experts observe the floor and check if it’s ready to be coated.
If the floor is made of concrete, it’s likely to be damaged with cracks unless it was recently installed. We check the moisture content in new concrete floors due to their porous nature and give them time to cure if they are still moist before grinding.
Grinding the floor removes its topmost layer and, with it, dirt and grease. It also gives the surface a rough texture, which is essential for the epoxy coating to bind to. To ensure that only a thin top layer is grinded, a diamond grinder is usually used during the epoxy floor coating process.
2. Acid Etching
Etching your floor is a crucial step to ensure the steel coated epoxy floor’s durability. Acid etching is a chemical process that dissolves away laitance from the surface of concrete, making it more favorable to epoxy bonding.
After the grinding process, our professionals spray muriatic acid solution onto the concrete floor and scrub it with our tools to ensure uniform application. The hydrochloric acid in the solution reacts with the laitance, allowing the concrete to bind strongly to the epoxy steel flooring.
The acid etching process is completed in four total stages; these are:
- Spraying
- Scrubbing
- Neutralizing
- Rinsing
The acid needs to be completely neutralized, for which it’s made to react with a basic compound like aqueous ammonia. The resulting compound is a salt, which has to be thoroughly rinsed to be removed. Acid and other chemicals are dangerous to handle, which is why we strongly advise against DIYs and only recommend hiring experts for epoxy flooring jobs.
3. Filling Joints and Cracks
Now that your floor is prepped, the epoxy resin compound can be poured onto it. But before that, we fill in any cracks in the concrete that might have occurred due to moisture trapped in its pores. If your floor has joints, we also fill them with epoxy fillers to ensure that it doesn’t show any future signs of damage after the steel flooring is installed.
Steel Coated Floors also offers damage repair services for customers with bad experiences with DIY epoxy flooring jobs or inexperienced contractors.
4. Applying the Basecoat
Before applying the basecoat, the floor is swept of any debris and vacuumed to completely free the floor of dirt and dust. We then apply the basecoat, a mixture of 100% solids epoxy resins and a hardening agent.
The percentage of epoxy determines its durability—the higher the percentage, the more its robustness. However, as the solids content (the percentage) in the epoxy increases, its ease of application decreases. Only a professional can handle a 100% solids epoxy flooring process, but only that can give you a beautiful finish.
We also offer customers the choice of color options at this stage. You can choose a color for the basecoat or keep it classic. Epoxy resin is originally clear, but we mix in paints to meet your aesthetic requirements. After it reacts with the hardener, the basecoat is applied to the floor.
5. Adding Texture Flakes
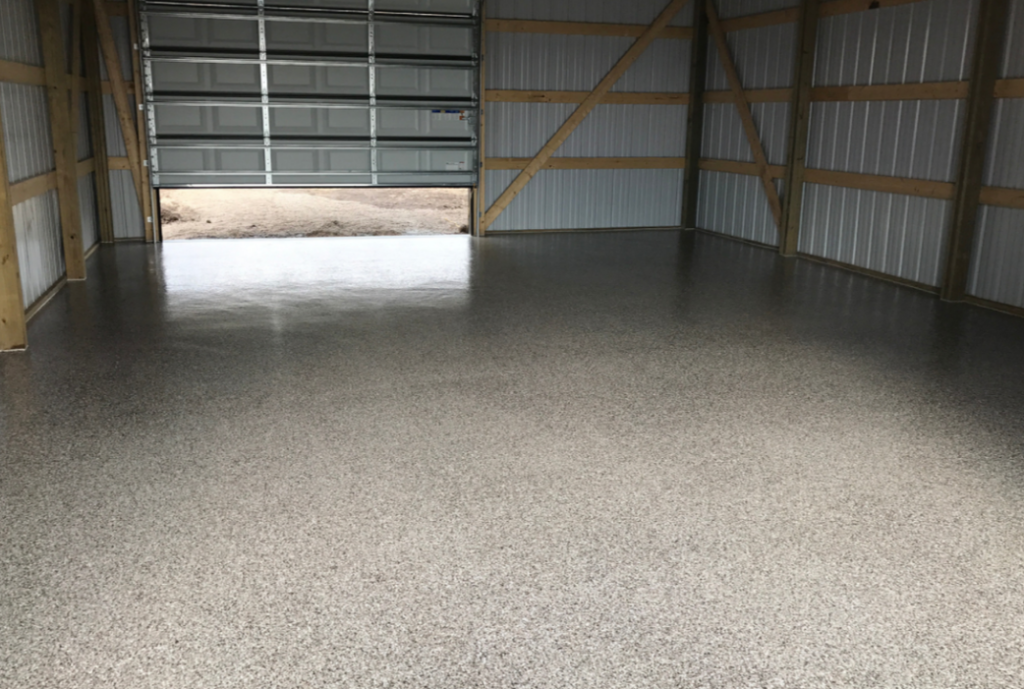
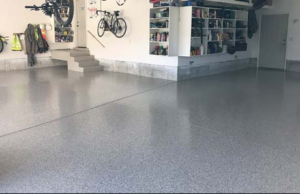
There are two reasons we add texture flakes to our steel coated epoxy floors: they look great, and they ensure the floor isn’t slippery. After applying the base coat, resin or acrylic pieces of different sizes and colors are layered over the floor.
We offer four different flake styles to choose from, including Tan Steel, Tan Slate, Gray Steel, and Gray Slate. They’re ideal for warehouse floors, flooring for shops, and industrial epoxy floor coating because the pattern prevents any minor dust or stains from being visible.

6. Applying the Topcoat
Layering is the most important element of the epoxy floor coating process. The thicker the layers, the sturdier your epoxy floor. After the base layer and the texture flakes, it is essential to seal it all with a top coat of epoxy resin.
The top coat is clear, compared to the usually color-mixed base coat. Its purpose is to cover the layers below and act like a shield to the steel epoxy flooring. The floor requires a couple of days to cure, after which it is ready to be used!
The epoxy floor coating process is complex and requires perfection at every step to ensure it stays damage-free, waterproof, and impact resistant. Beware of DIY kits—they can destroy your floors!
For a quick but professional epoxy floor installation, contact Steel Coated Floors. We’ve served 14 states for over 30 years, with over 6500 successful jobs! Click here for information about our company.